https://docs.isaacsim.omniverse.nvidia.com/5.1.0/ros2_tutorials/tutorial_ros2_qos.html
ROS 2 Quality of Service (QoS) — Isaac Sim Documentation
Note By default Fast DDS (formerly Fast RTPS) does not store depth so depth policy might appear as UNKNOWN. Try running Isaac Sim and ROS2 nodes using Cyclone DDS to retrieve depth info. If depth policy still appears as UNKNOWN after switching to Cyclone D
docs.isaacsim.omniverse.nvidia.com
1. Tools > Robotics > ROS 2 OmniGraphs > Generic Publisher를 선택한다.
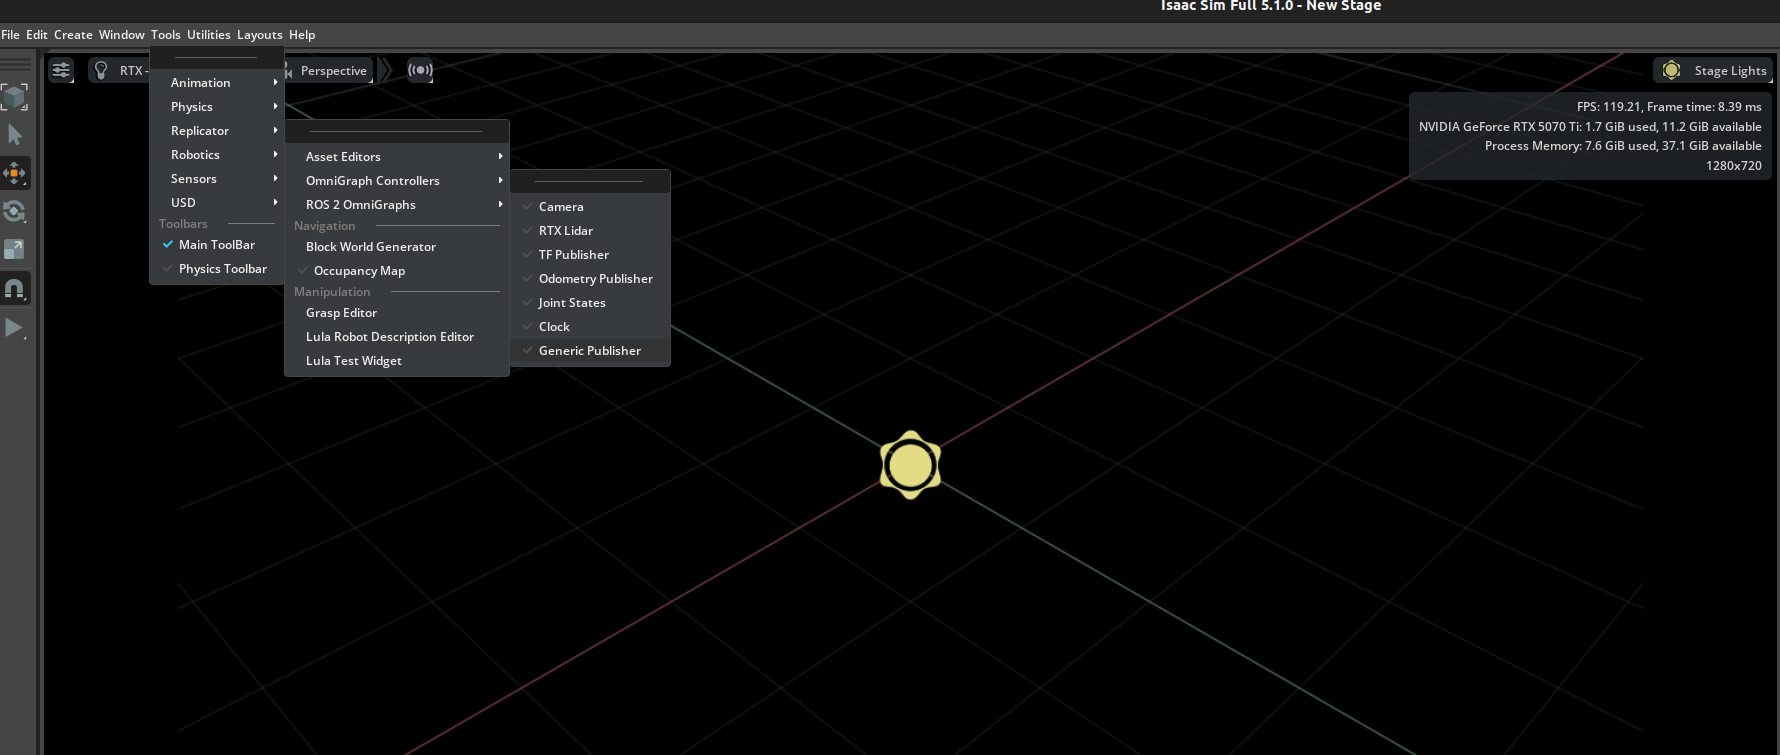
2. generic publisher graph에서 publish string을 선택하고 ok를 누른다.

3. 새롭게 생성된 graph prim을 펼치고, 그래프를 봐보자.


4. ros2 publisher같은 모든 ros2 omnigraph노드에는 qosProfile이라는 문자열 입력이 존재한다.
- 이 입력은 Json 문자열 형식이다. 기본적 설정 예시는 아래와 같다.
- depth는 양의 정수만 가능
- deadline , lifespan , leaseDuration은 json이 유효하려면 float으로 설정되어야함.
- 유효한 json 문자열을 사용하면, 어떠한 ros2 omnigraph노드의 qosProfile입력도 설정을 직접할 수 있다.
혹은, Ros2 QoS Profile 노드를 사용하면, 해당 문자열을 자동으로 생성해서, 여러 Ros2 노드에 출력값을 연결할 수 있다.

5. acton graph에서 ros2 qos profile노드를 추가하고 아래처럼 연결한다.

6. ros2 Qos Profile의 create profile입력에는 여러가지 미리 정의된 QoS profile이 존재한다.
- 다른 입력들은 개별 QoS 정책들로서 커스텀 QoS profile을 만들기 위해 개별 설정할 수 있다.

7. create Profile을 sensor data로 설정하고, play를 눌러 시뮬레이션을 시작한다.

8. 그리고 그래프에서 생성한 노드의 토픽에 대해서 info를 봐본다.
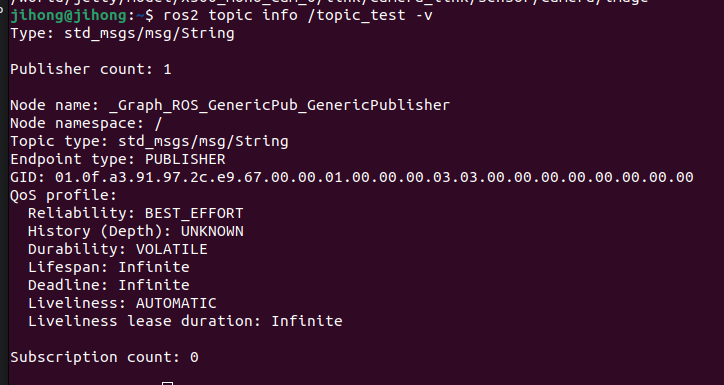
9. static publisher라는 것도 존재한다.
- 이는 msg를 1번만 publish만 한다. 하지만, 해당 msg가 subscriber가 몇명이든/언제 붙든 동일하게 받을 수 있게 하고 싶을때 사용한다.
- 그래서 아래와 같이 그래프를 구성해본다.
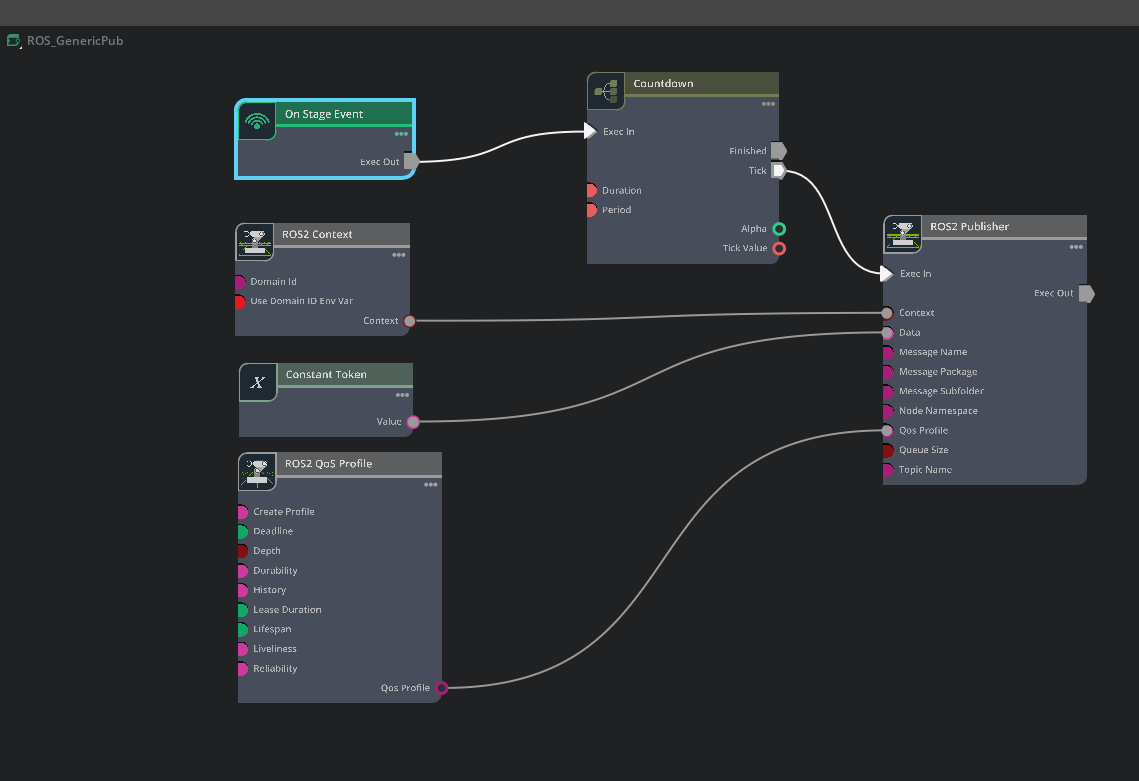
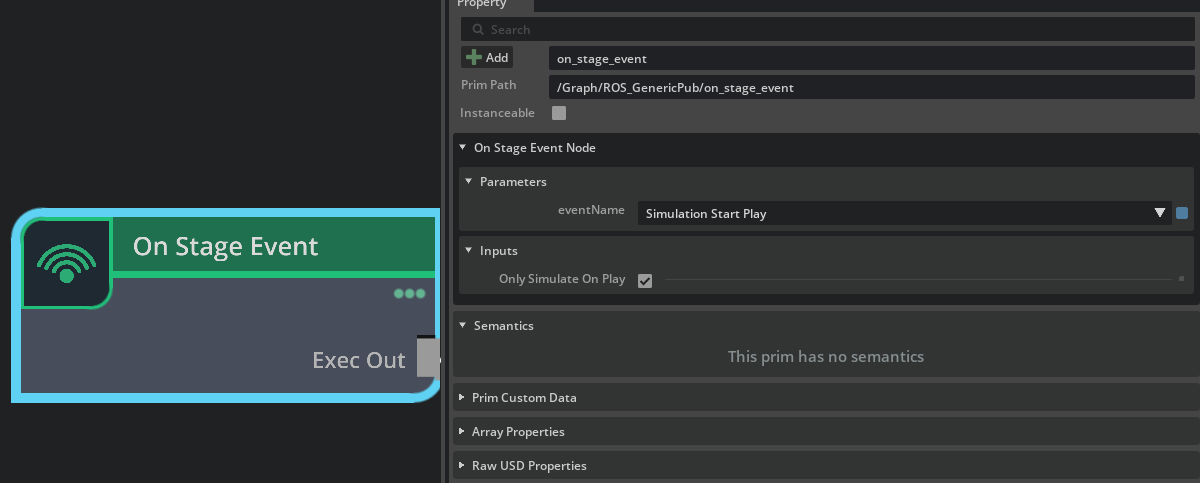
10. on stage event에서 event name을 sim start play로 설정한다.
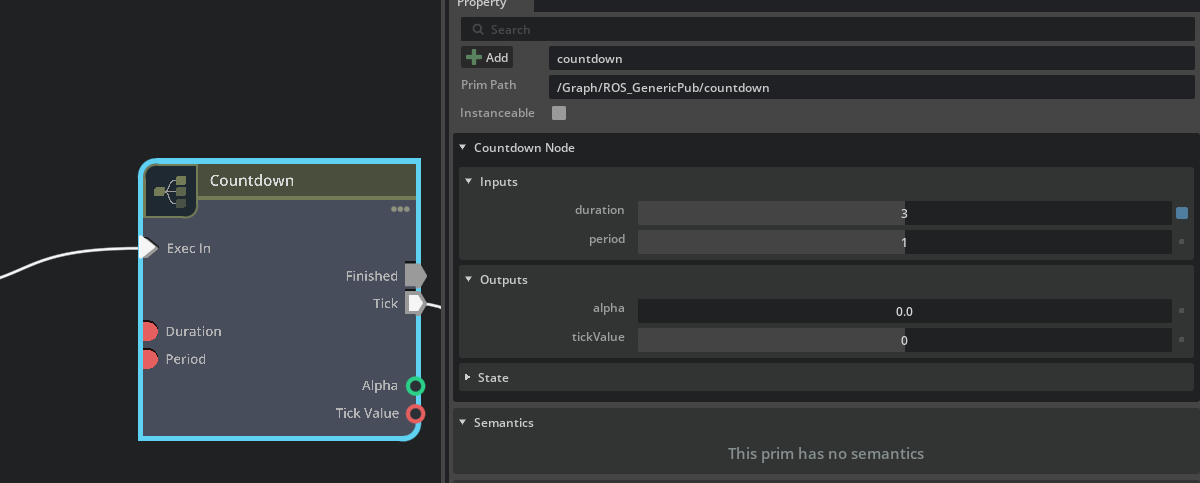
11. cutdown노드에서 duration을 3으로 설정. period를 1로 설정.
- 이렇게 한다면, 시뮬레이션이 play된 후에 ros2 publisher 노드를 3번 tick하게 만든다.
12. ROS2 QoS Profile 노드를 선택하고 createProfile을 Default for publisher/subscribers로 설정
- 그리고 depth를 1로 설정.
- 그리고 durability를 transientLocal로 설정

13. 확인( 매 play당 한번만 나옴 )
https://docs.isaacsim.omniverse.nvidia.com/5.1.0/ros2_tutorials/tutorial_ros2_manipulation.html
ROS2 Joint Control: Extension Python Scripting — Isaac Sim Documentation
Note Articulation Root describes the beginning of an articulation tree, a collection of links and joints that makes up the robot in simulation. For fixed base robots like the franka, articulation root is specified at its root joint to world, and for move-a
docs.isaacsim.omniverse.nvidia.com
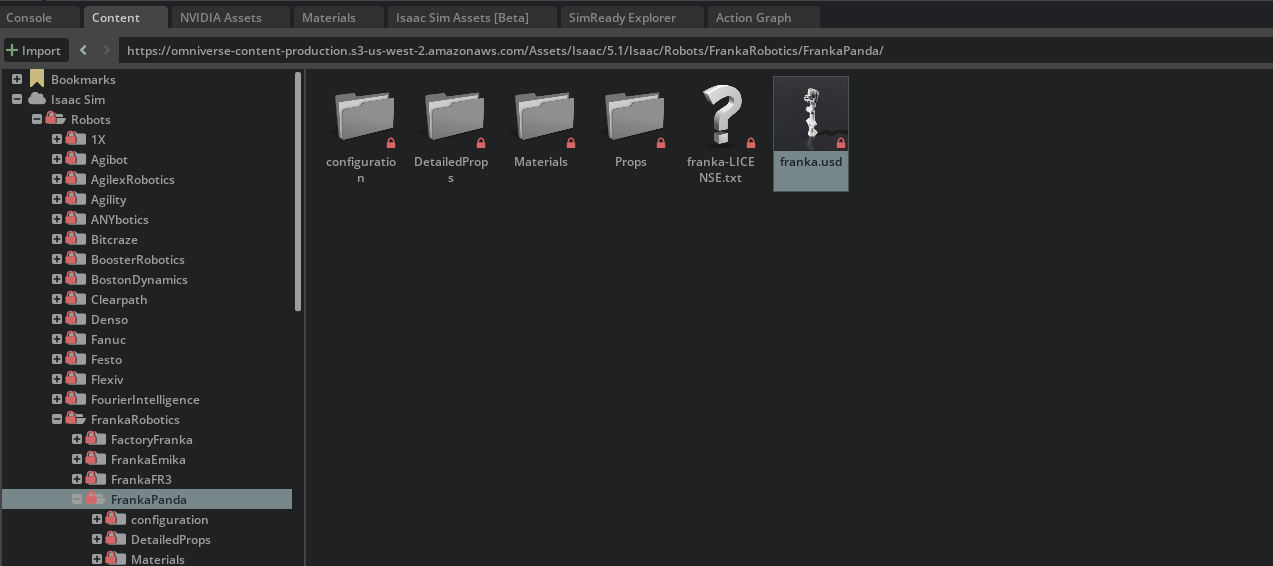
1. saac Sim > Robots > FrankaRobotics > FrankaPanda > franka.usd을 불러온다.
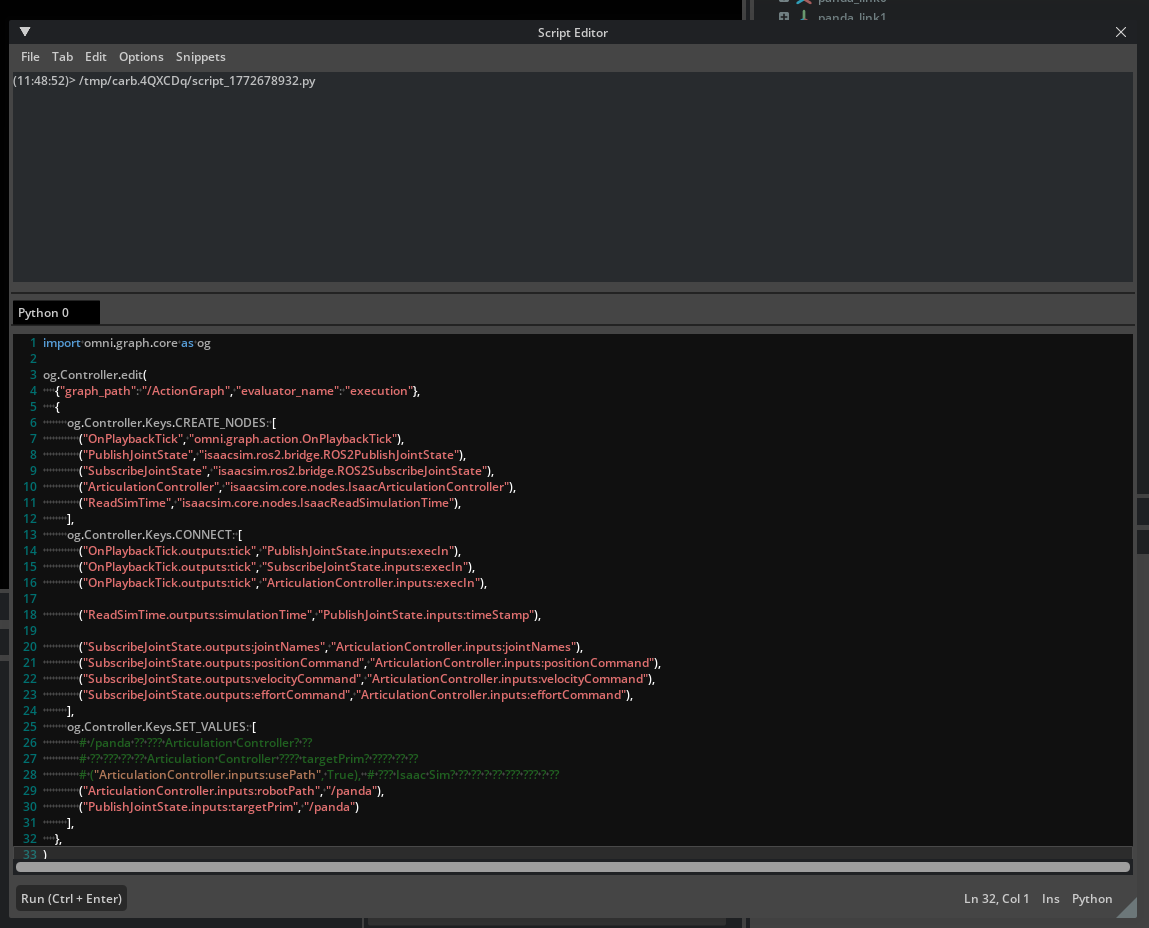
2. 이렇게 action graph를 생성한다.
- on playback tick : 매 시뮬레이션 프레임마다, 다른 그래프 노드들을 실행
- isaac read sim time : 현재 시뮬레이션 시간을 가져옴
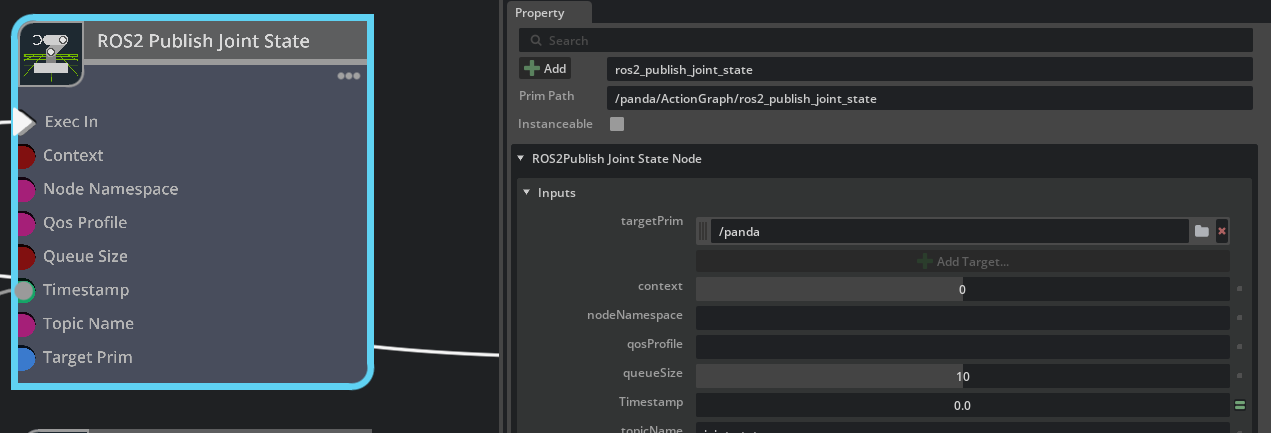
- ros2 publish joint state : /joint_states토픽으로 ros2 joint states를 publish한다.
- ros2 subscribe joint state : /joint_command 토픽에서 ros2 joint state를 subscribe한다.
- articulation controller : subsriber노드로부터 받은 명령에 따라 로봇 articulation을 움직임

3. ROS2 publish joint state노드들 선택한다. 그리고 아래처럼 target prim에 /panda를 추가한다.
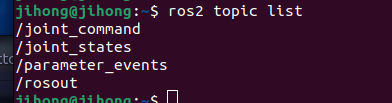
4. 그리고 시뮬레이터를 실행하면 토픽 2개가 추가됨.
- 그리고 echo를 하면 command는 당연히 명령이 들어온게 없으니 출력이 없다.
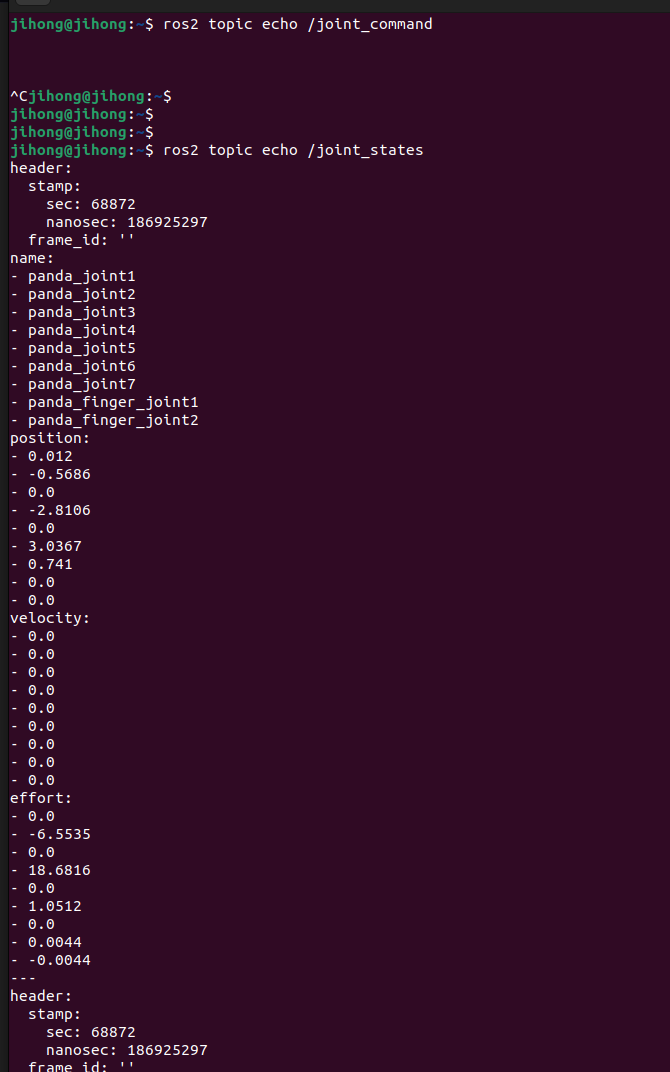
- joint state는 echo하면 현재 상태가 출력된다
5. 우선 IsaacSim-ros-workspaces로 가서 source를 해주자.

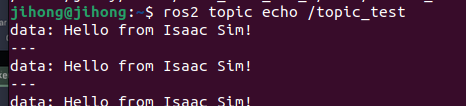
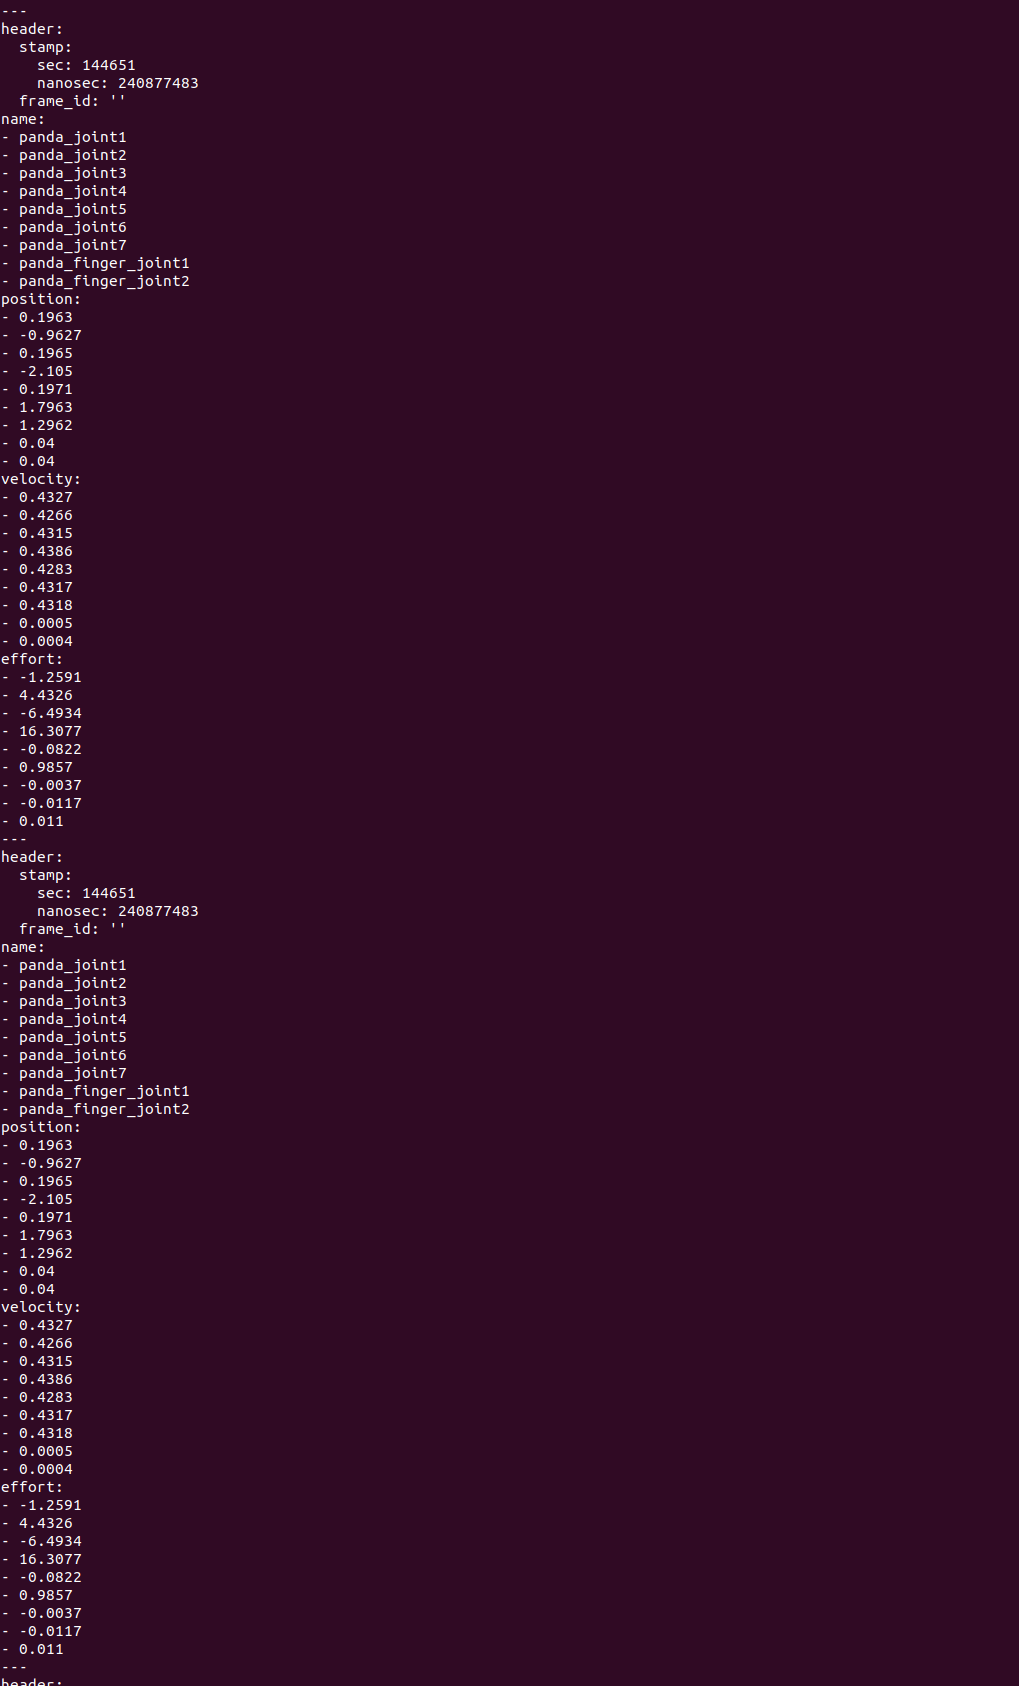
6. ros2 run isaac_tutorials ros2_publisher.py을 하면 로봇이 움직일거임. 그때 ros2 topic echo /joint_states로 확인해본다.
그러면 각 state가 바뀌는거를 확인 가능.
'코딩 및 기타' 카테고리의 다른 글
| [isaac sim] ROS2 tutorials 9 (1) | 2026.03.10 |
|---|---|
| [isaac sim] ROS2 tutorials 8 (0) | 2026.03.05 |
| [isaac sim] ROS2 tutorials 6 (0) | 2026.03.03 |
| [tello] (0) | 2026.03.03 |
| [isaac sim] [node]Differential controller , Articulation Controller , issac read simulation time , isaac simulation gate (0) | 2026.02.28 |