https://docs.nav2.org/plugin_tutorials/docs/writing_new_costmap2d_plugin.html
Writing a New Costmap2D Plugin — Nav2 1.0.0 documentation
At the next step it is required to tell Costmap2D about new plugin. For that the plugin should be added to plugin_names and plugin_types lists in nav2_params.yaml optionally for local_costmap/global_costmap in order to be enabled in run-time for Controller
docs.nav2.org
overview
- 본 튜토리얼은 costmap 2D용 간단한 플러그인을 직접 만들어 볼 것이다.
1. Write a new Costmap2D plugin
- 본 튜토리얼에서는 costmap에 반복적으로 cost gradient를 생성하는 플러그인을 만든다.
- 주석 처리가 된 코드는 navigation2_tutortials저장소에서 확인 가능.
- 플러그인 클래스인 nav2_gradient_costmap_plugin::GradientLayer는 기본 클래스인 nav2_costmap_2d::Layer를 상속받아서 정의된다. ( GradientLayer는 하나의 costmap layer이다. )
GradientLayer는 nav2_costmap_2d::Layer를 상속받으니 onInitialize() , updateBounds(), updateCosts(), onFootprintChanged(), reset()과 같은 API를 오버라이드한다.- 기본 클래스는 플러그인에서 costmap layer와 상호작용하기 위한 API를 제공한다.
- 이 API들은 LayeredCostmap에 의해서 호출된다.( 기본 플러그인에서 제공하는 API들은 아래 표 참고... )
- onInitialize()는 초기화시에 한번만 동작하며, 매 사이클마다 updateBounds와 updateCosts와 onFootprintChanged(로봇 모양 바뀌면)을 호출한다.
- 기본 클래스는 플러그인에서 costmap layer와 상호작용하기 위한 API를 제공한다.
namespace nav2_graident_costmap_plugin
{
class GradientLayer : public nav2_costmap_2d::Layer| VIrtual method ( API ) | Method description | Requires override? |
| onInitialize() | 해당 메서드는 플러그인 초기화가 완료된 후에 호출된다. 보통 여기에서 ROS파라미터 선언이 이루어지며, 필요한 초기화 작업은 모두 해당 메서드안에서 수행해야한다. |
No |
| updateBounds() | 해당 메서드는 플러그인에게 "costmap layer의 어느 영역을 업데이트 해야하나?"를 묻기 위해서 호출한다. - 입력 : 로봇의 위치와 방향 ( x , y , yaw ) - 출력 : 업데이트할 영역을 나타내는 4개의 윈도우 경계(min_i , min_j , max_i , max_j )에 대한 포인터 경계 정보는 성능 최적화를 위해서 사용한다.( 매 사이클마다 전체 costmap을 갱신하지 않고도, 새로운 정보가 반영되는 부분만 업데이트 하는 방식...) |
yes |
| updateCosts() | 해당 메서드는 costmap을 재계산 해야할때 마다 호출된다. 계산 윈도우(bounds)안에서만 costmap layer를 갱신을 수행한다. - 입력 : 윈도우 경계값 4개(min_i , min_j , max_i , max_j ) - 출력 : 최종 costmap인 master_grid에 대한 참조 Layer클래스는 플러그인 내부 costmap인 costmap_을 제공한다. 내부 costmap을 기반으로 갱신을 수행해야한다. 그 후에는 master_grid가 윈도우 경계 내의 값을 아래의 메서드 중 하나를 사용해서 업데이트 해야한다. - updateWithAddition() - updateWithMax() - updateWithOverwrite() - updateWithTrueOverwrite() |
yes |
| matchSize() | Method is called each time when map size was changed. | no |
| onFootprintChanged() | Method is called each time when footprint was changed. | no |
| reset() | It may have any code to be executed during costmap reset. | yes |
1-1. GradientLayer::onInitialize()
- ROS파라미터를 기본값과 함께 선언한다.
declareParemeter("enabled", rclcpp::ParameterValue(true));
node_->get_parameter(name_ + "." + "enabled" , enabled_);- 비용 재계산이 필요한지 나타내는 플래그를 초기화한다.
need_recalculation_=false;
1-2. GradientLayer::updateBounds()
- need_recalucation_이 true일때, 윈도우(유효 범위)경계를 재계산하고, 그 값(값은 need_recalculation_)에 관계없이 항상 경계를 업데이트한다.
1-3. GradientLayer::updateCosts()
- cost gradient를 기존의 레이어와 합치지 않고, 최종 코스트맵(master_grid)에 직접 기록한다.
- 내부 costmap_에 작성한 뒤 updateWithTrueOverride()를 호출하는 것과 동등하게 동작한다.
- GRADIENT_SIZE는 그라데이션 주기(period)의 셀( cell ) 단위이다.
- GRADIENT_FACTOR는 하나의 cell마다, cost를 얼마나 감소시킬지 나타내는 계수이다.
int gradient_index;
for( int j=min_j ; i<max_i ; i++){
	int index = master_grid.getIndex( i , j );
    unsigned char cost = ( LETHAL_OBSTACLE - gradient_index*GRADIENT_FACTOR )%255;

    if (gradient_index <= GRADIENT_SIZE) {
      gradient_index++;
    }
    else {
      gradient_index = 0;
    }

	master_array[index] = cost;
  }
}
1-4. GradientLayer::onFootprintChanged()
- need_recalucation_값을 단순히 reset한다.
1-4. GradientLayer::reset()
- 이번 예제에서는 사용하지 않는 메서드이다.
- 부모클래스인 Layer의 순수 가상 함수인 reset()을 반드시 override해야해서 남아있다.
2. Export and make GradientLayer plugin
- 작성한 플러그인은 런타임에 기본 상위 클래스 타입으로 로드된다. ( 기본 상위 클래스 타입은 플러그인이 반드시 구현해야하는 공통 인터페이스( 혹은 추상클래스)이다.)
- costmap2D의 경우에는 LayeredCostmap같은 플러그인 핸들링 모듈에 의해서 호출된다. ( 핸들링 모듈은 로드된 플러그인을 실제로 관리 및 호출해주는 nav2의 내부 컴포넌트이다. )
- pluginlib은 런타임에 주어진 플러그인을 열고, 내보낸(exported) 클래스의 메서드를 호출할 수 있도록 해준다.
이때 클래스 내보내기(export) 메커니즘은 어떤 기본 클래스 타입으로 로드할지를 알려주며, 이를 통해 애플리케이션 소스를 수정하거나 재컴파일하지 않고도 플러그인을 확장할 수 있다.
- 예제에서 nav2_gradient_costmap_plugin::GradientLayer플러그인은 런타임에 nav2_costmap_2d::Layer기본 클래스로 동적 로드되어야 한다. 이를 위해 아래의 작업을 수행합니다.
- 튜토리얼 페이지 보면서 수정..
- 1. 플러그인 구현 파일인 gradient_layer.cpp을 수정
- 2. 플러그인 패키지 안에서 gradient_plugins.xml과 같은 xml파일에 수정
- 3. CMake설정
- 4. package.xml수정
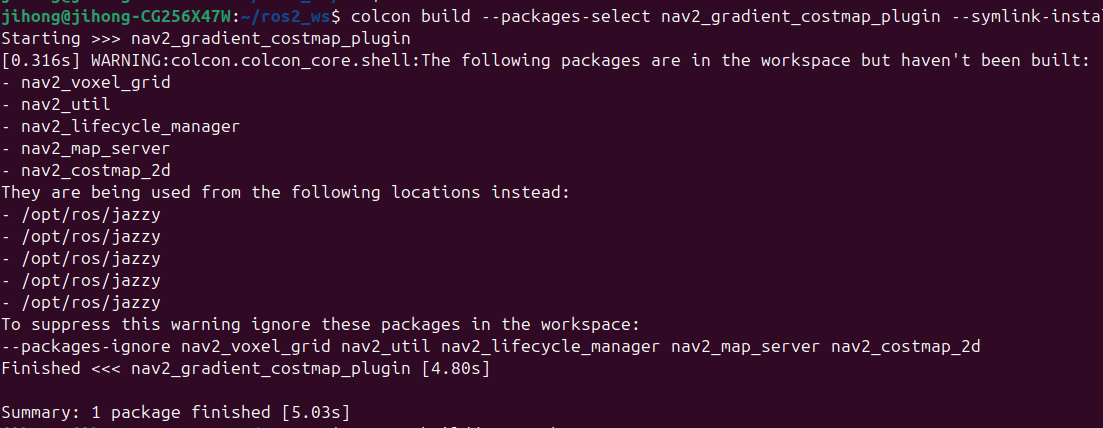
- 5. 빌드하기
'gazebo > Nav2' 카테고리의 다른 글
| [Nav2][amcl] AMCL패키지에서 어떻게 localization되는지 살펴보기 (0) | 2025.05.29 |
|---|---|
| [Nav2][AMCL] navigation2 패키지를 rosw_ws에서 빌드하기 (1) | 2025.05.19 |
| nav2 - Setting Up Odometry - Gazebo (0) | 2025.04.17 |
| nav2 - Setting Up URDF (0) | 2025.04.15 |
| nav2 - (STVL) Using an External Costmap Plugin (0) | 2025.04.03 |